How to install a Tremol-No system
Everything you need to know about fitting the brilliantly named tremolo-blocking system into a Strat-style guitar
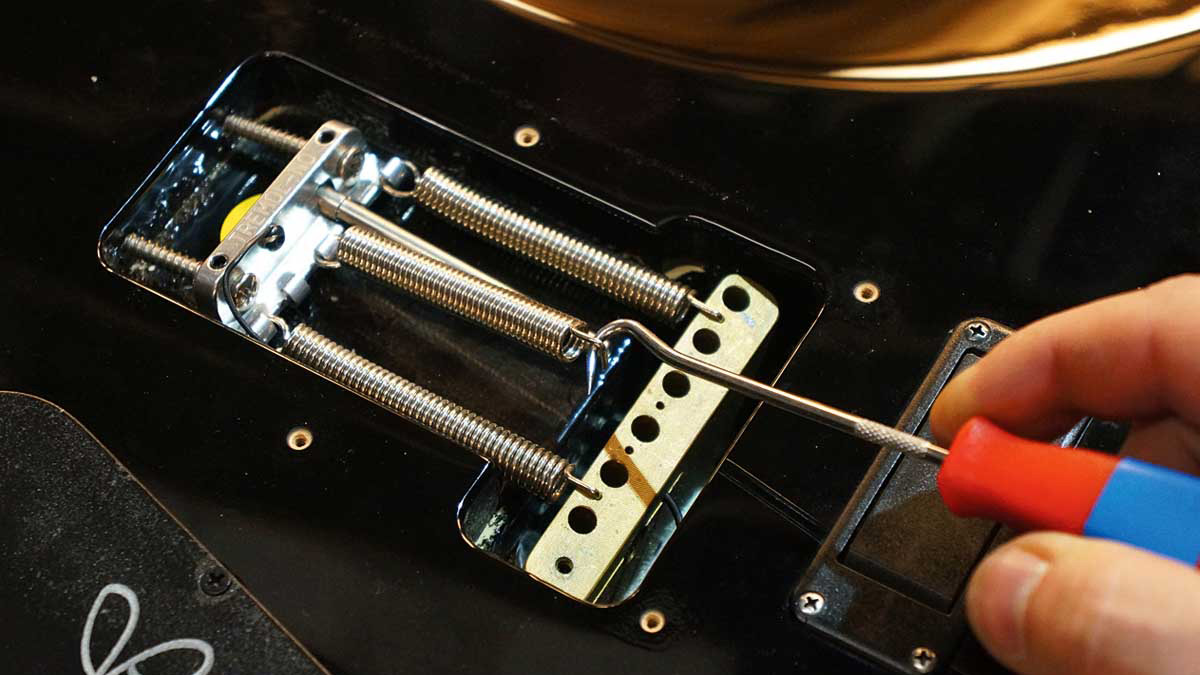
There are a lot of odd, specialist gadgets and gizmos out there for guitars, but this one gives a unique advantage – it allows you to block off your tremolo on the fly with nothing but mere knob twiddling. We’ll show you how to install it in this walkthrough, but first let’s see what it’s all about.
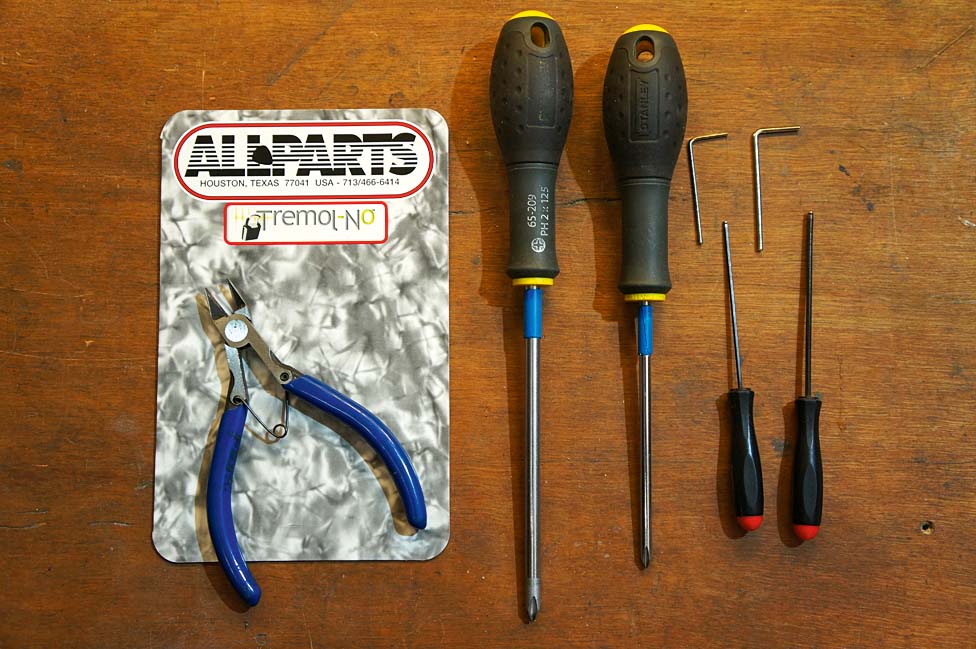
• Tremol-No unit
• Allen keys
• Wire cutters
• PH1 screwdriver
• PH2 screwdriver
Skill level: easy
The Tremol-No is made for tremolos that are fully floating – that is any tremolo that can move in both directions. It’s built to work in Strat and Super Strat designs, which is quite a wide spectrum of tremolos.
We’re modifying an Ernie Ball Music Man John Petrucci JP6 here, but the Tremol-No will work on Fenders, Ibanez and basically anything that uses the Fender-style rear tremolo rout.
You may ask yourself, ‘Why would I need this?’ Well, if you rest your hand on the tremolo for palm muting then you’ll hear the pitch of the strings raise up, which can be a bit of a pain. It would be a shame to permanently block off such an awesome floating tremolo system...
Step 1.
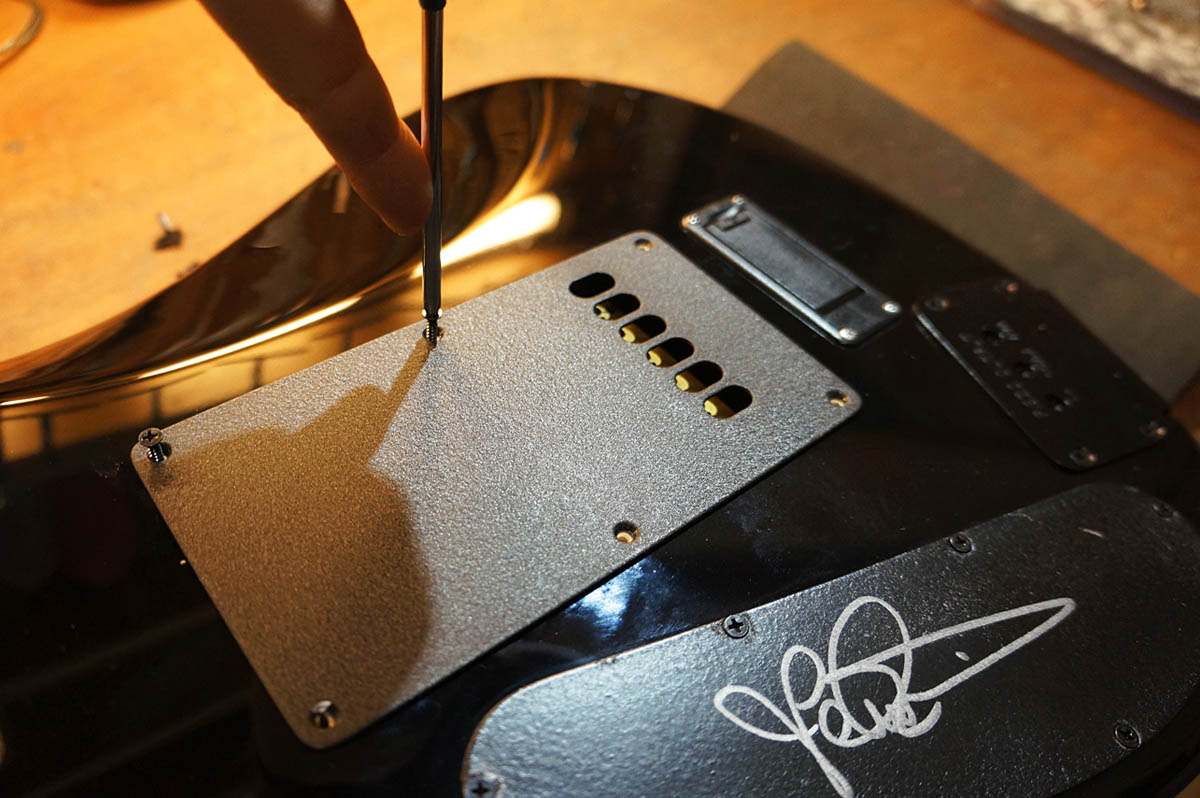
Gain access. Whip off the back cover and store the screws carefully. These things are easier than a plectrum to lose. Measure the gap between the old claw and the timber as we’ll put the new one in the same location. If your tremolo is balanced already you can keep the strings on and ‘in tune’ – we’ll show you why later!
Step 2.
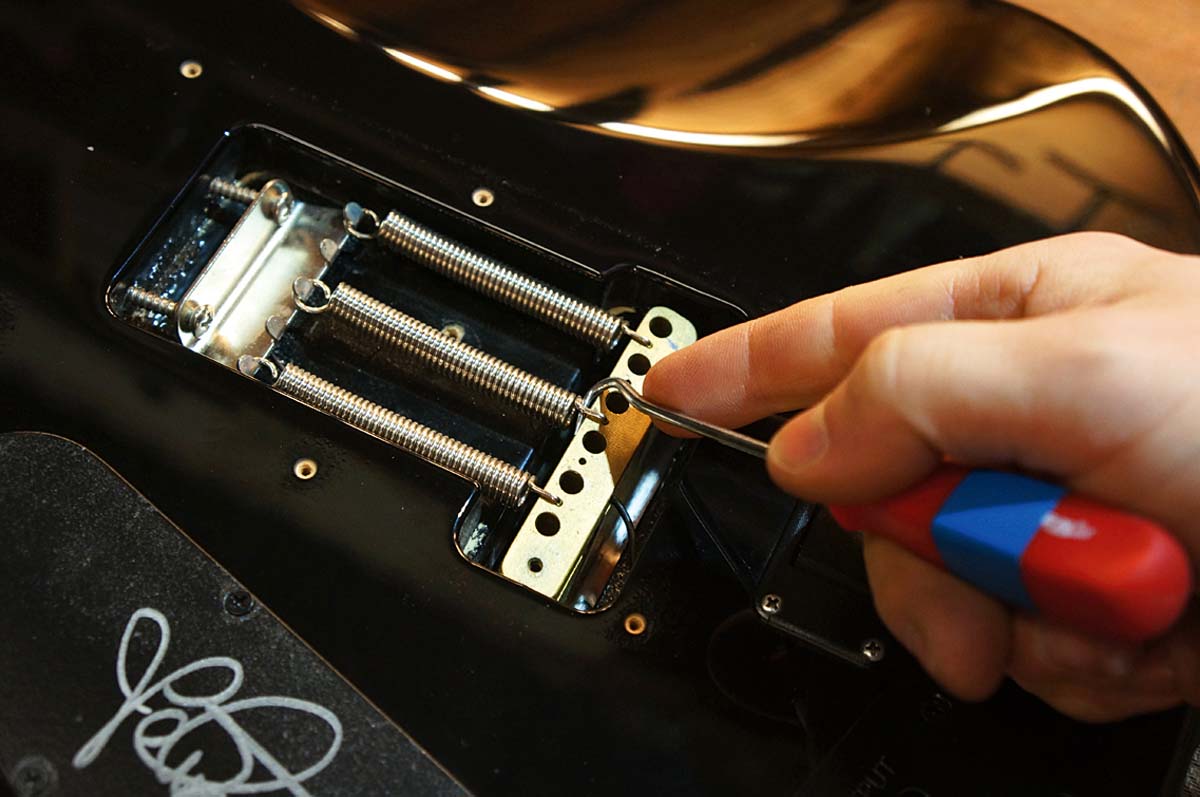
As the Tremol-No kit comes with its own tremolo claw built in, we need to take out the old one. This starts with removing the three springs. Take note of the orientation of the springs as it may help to replace them the same way as they were. This handy hook tool makes the job a breeze.
Step 3.
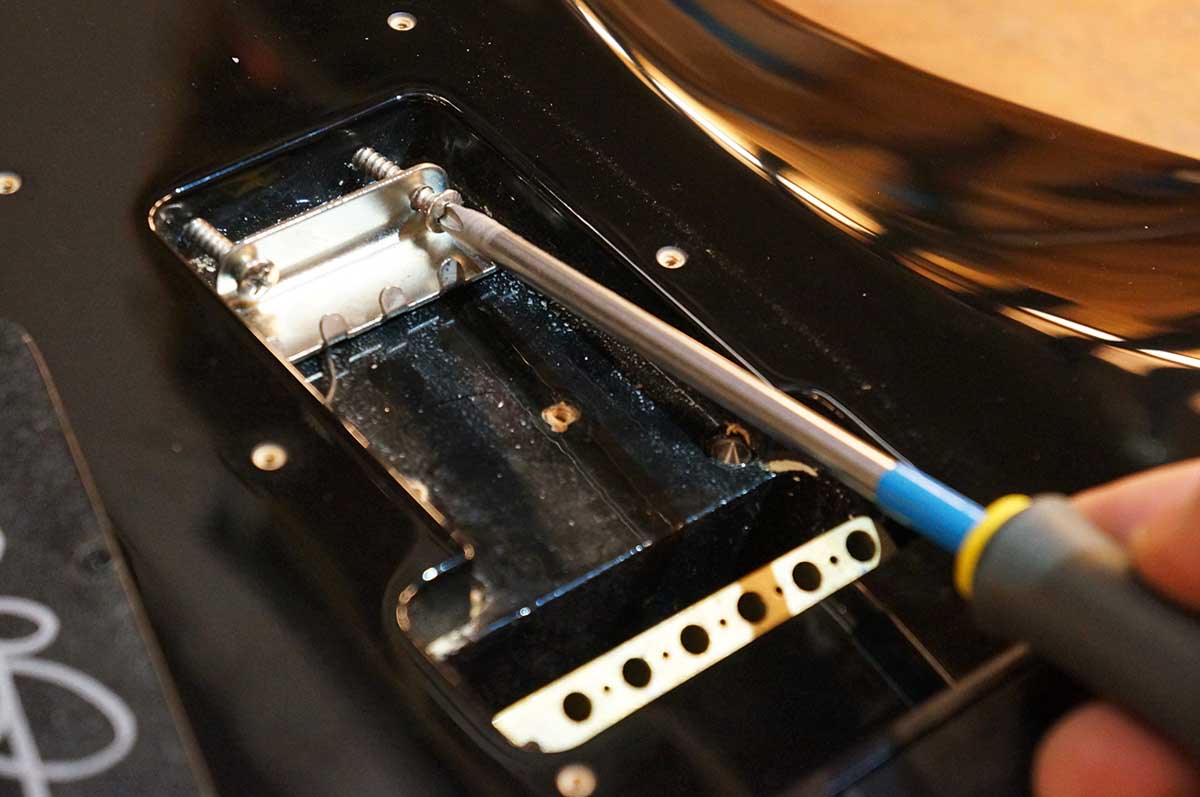
Let’s retire that old tremolo claw now. With the springs out the way it should be dangling around. Using a PH2 screwdriver, unscrew the wooden screws that are drilled in diagonally.
They can take some force so make sure you have good pressure on the screw head, otherwise it can strip the screw, and you don’t want to go there.
Step 4.
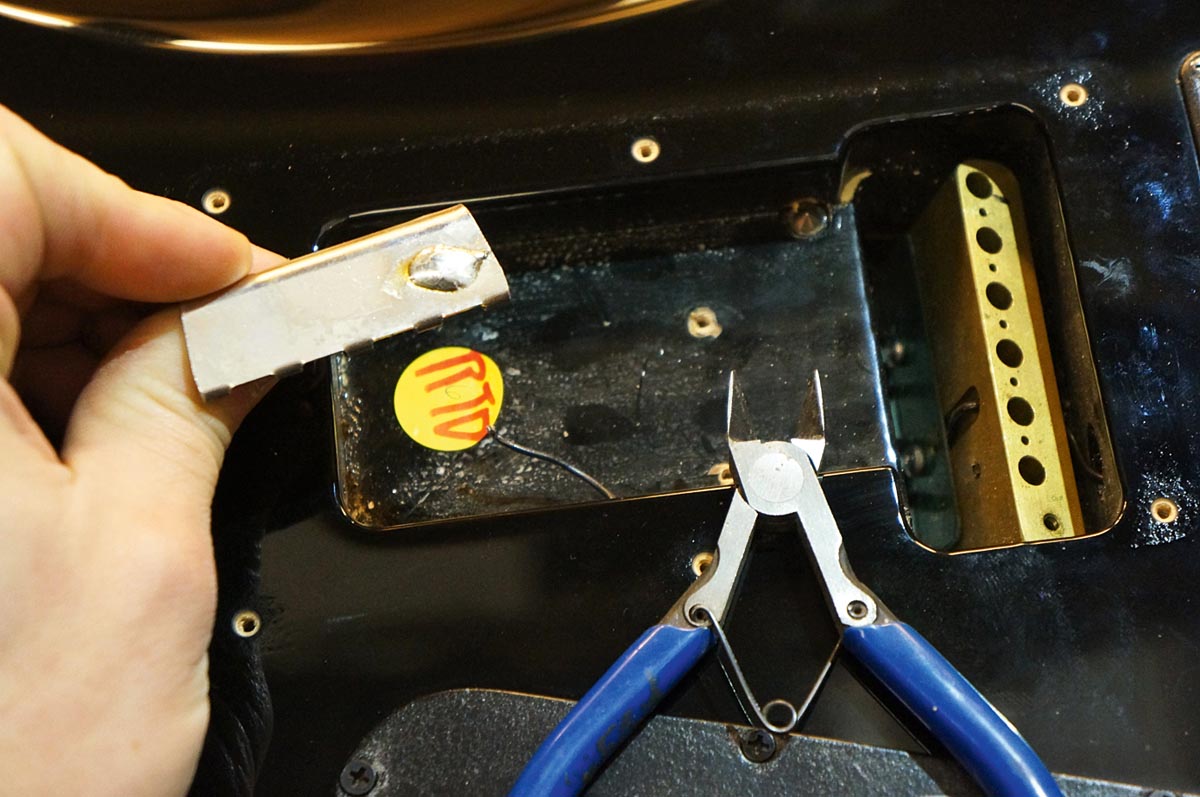
On Strat-style instruments there’s a wire soldered onto the claw. Chop it off at the claw and we’ll replace it later. This wire connects the ground circuit to the claw and therefore the springs to tremolo to strings to you!
This helps keep circuit humming down to a minimum, so it’s recommended to replace it later.
Step 5.
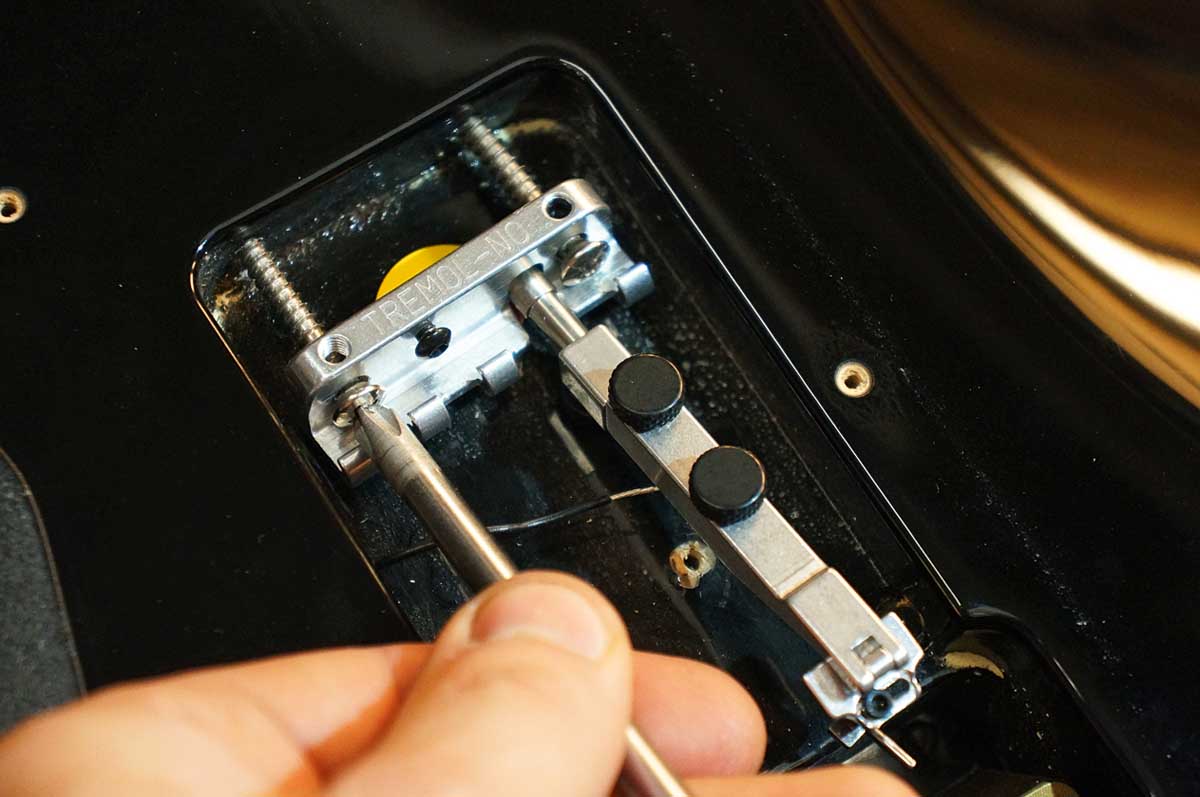
Break out the Tremol-no from the packet and screw it in. It’s a direct replacement for the old claw, so you know what to do already!
It might help you to remove the sliding part from the Tremol-no so it’s not in the way while you’re working on it.
Step 6.
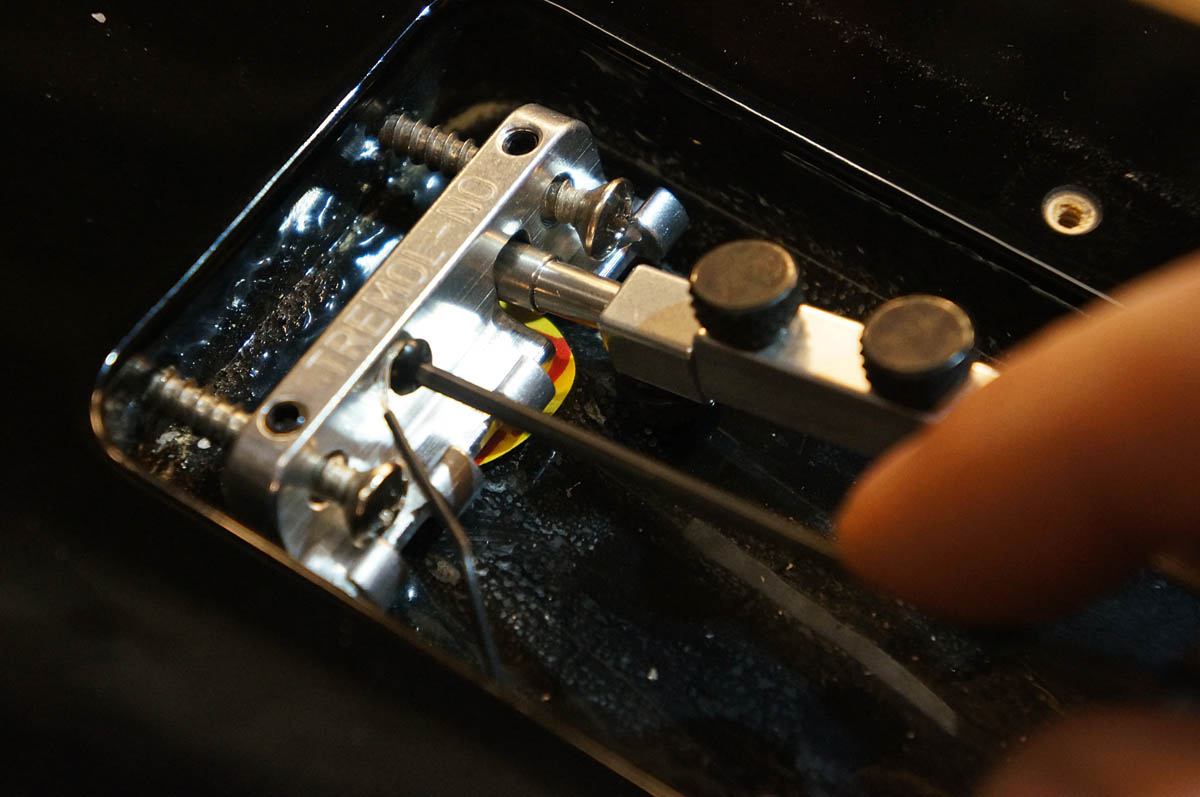
Let’s reattach that all-important ground wire back onto the new and improved tremolo claw. You’ll never get that soldered to aluminium, so it needs to be bolted on.
A good tip is to make a wire loop round an allen key, pop the bolt through this eyelet and when you tighten it should stay put.
Step 7.
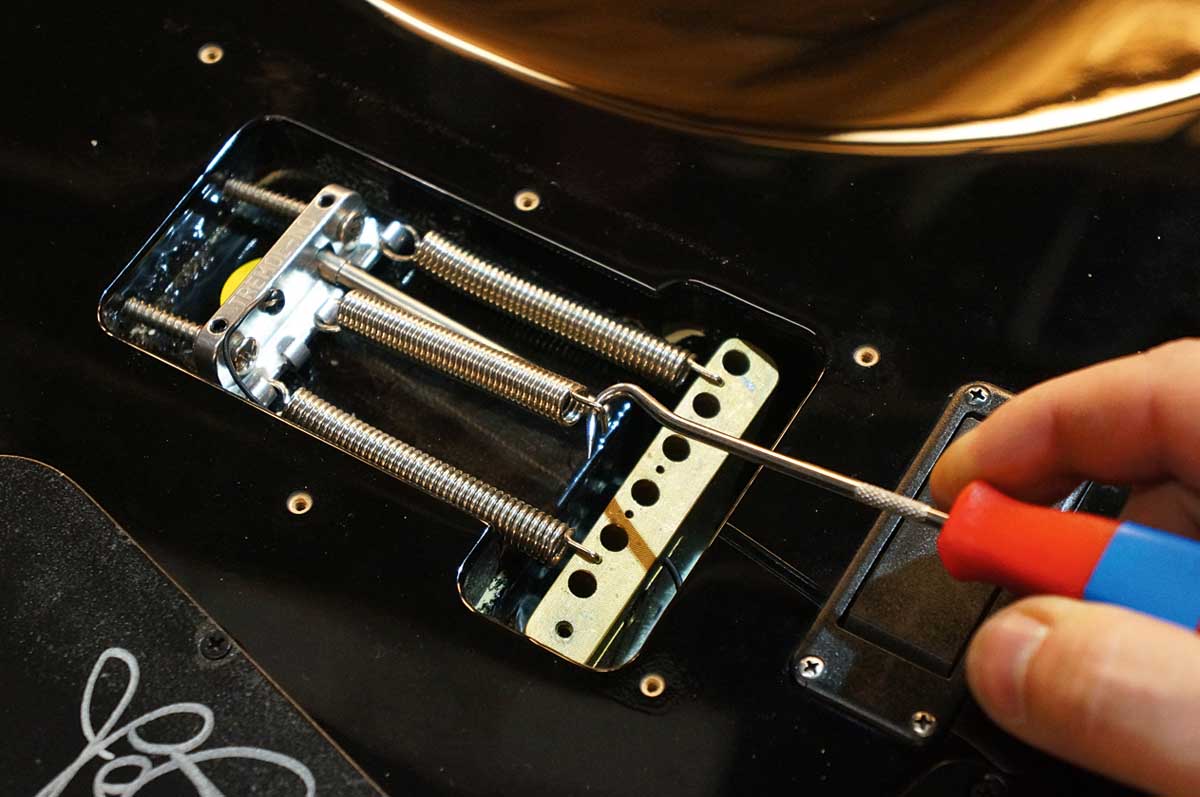
See how we ended up taking off the slidey parts? We needed a little more space… So it’s time to re-spring the tremolo to the claw.
We advise starting with the tremolo claw loose with lots of the wooden screws protruding. Pop all the springs in, then you can re-tension the wood screws later.
Step 8.
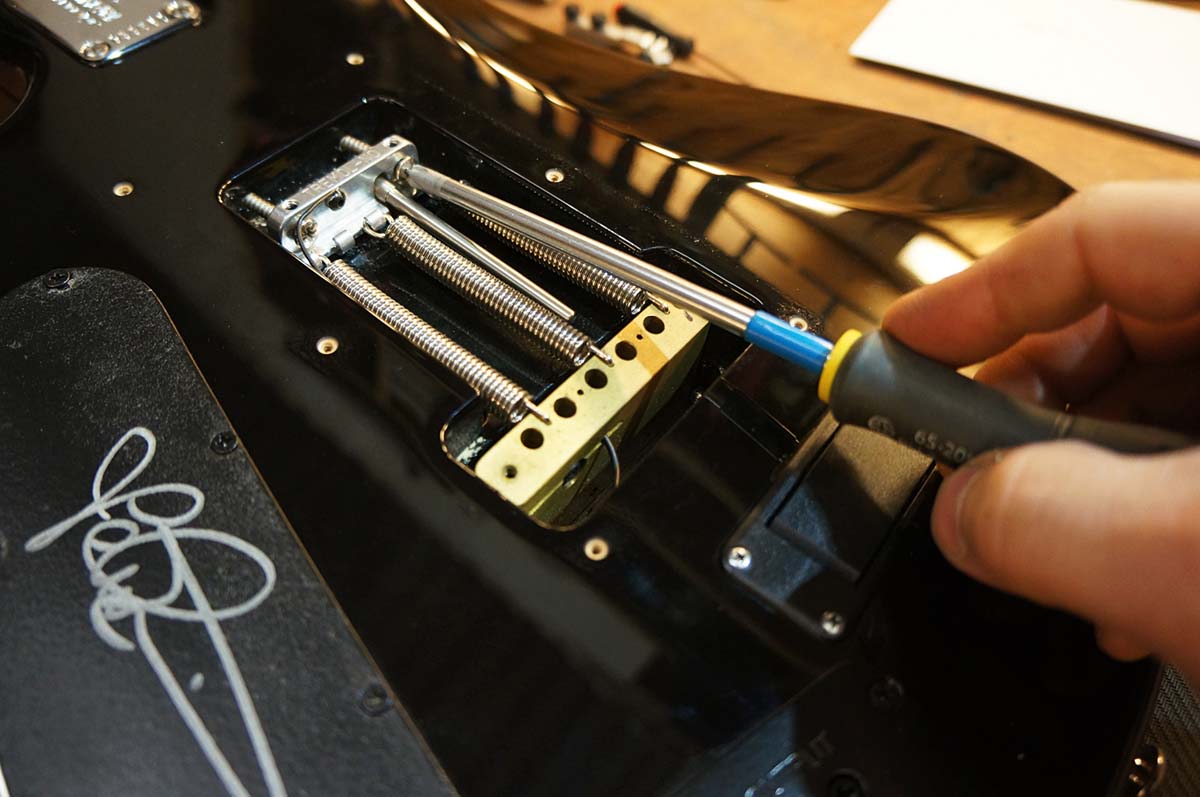
If your tremolo was already balanced at the start of all this then you can now tighten the tremolo claw screws back up to re-balance. Either use the measurement you took at the start or tighten until the strings are back in tune!
There will be a small bit of tuning slippage sure but you’ll be close at least.
Step 9.
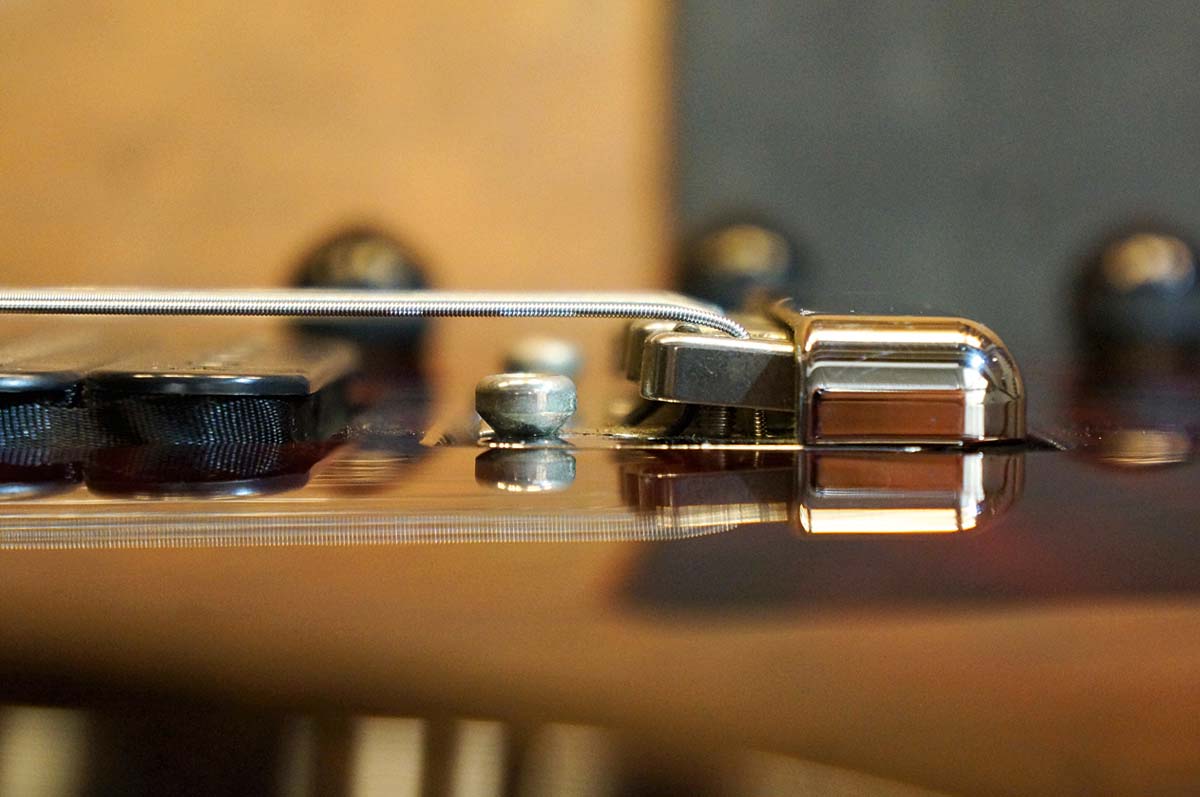
This is how your floating tremolo should look when it’s balanced – the bottom plane is parallel to the string line ,and on this guitar, parallel to the paintwork too.
If your tremolo is out of whack then you need to re-balance it. Adjusting it is a combination of balancing the spring tension versus the string tension.
Step 10.
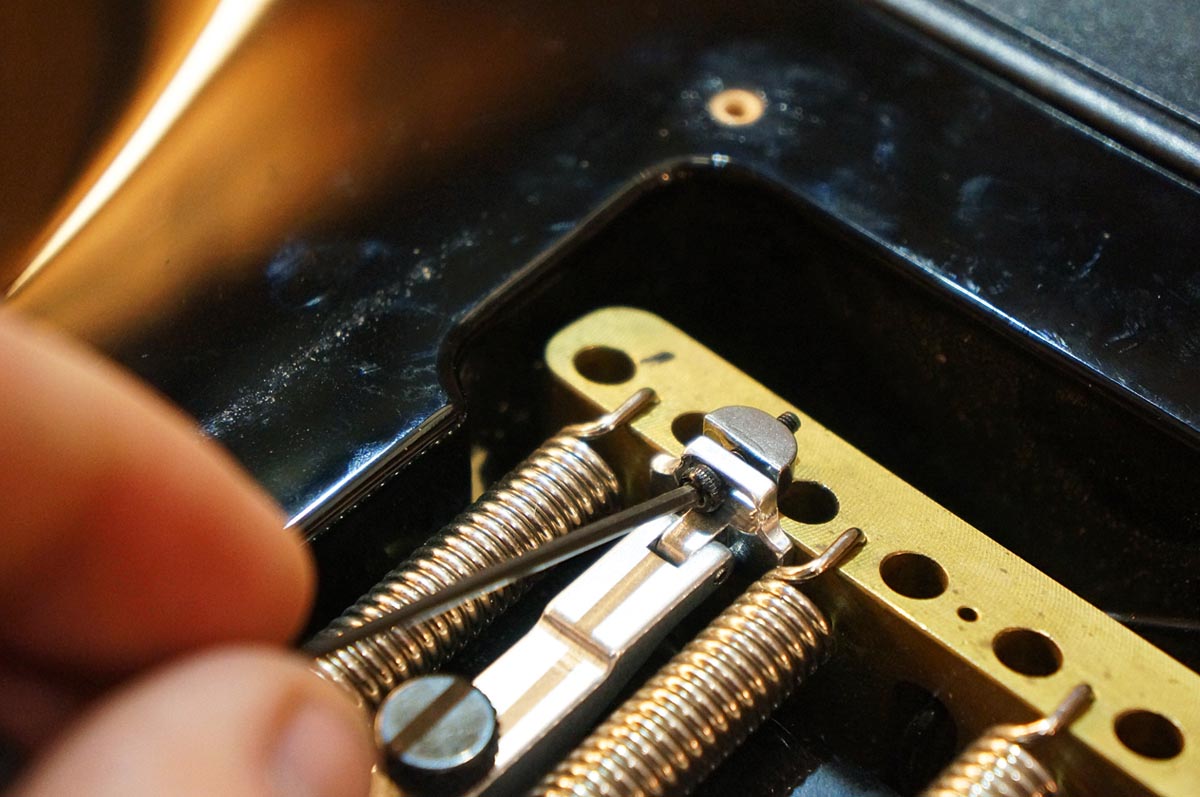
You will have noticed that we’ve ignored the Tremol-No for a couple of steps. It’s designed to augment the tremolo system so we needed to get the trem right first.
Tighten up the clamp onto the tremolo string block and make sure it’s not misaligned, so it doesn’t drag on anything. Don’t over tighten it.
Step 11.
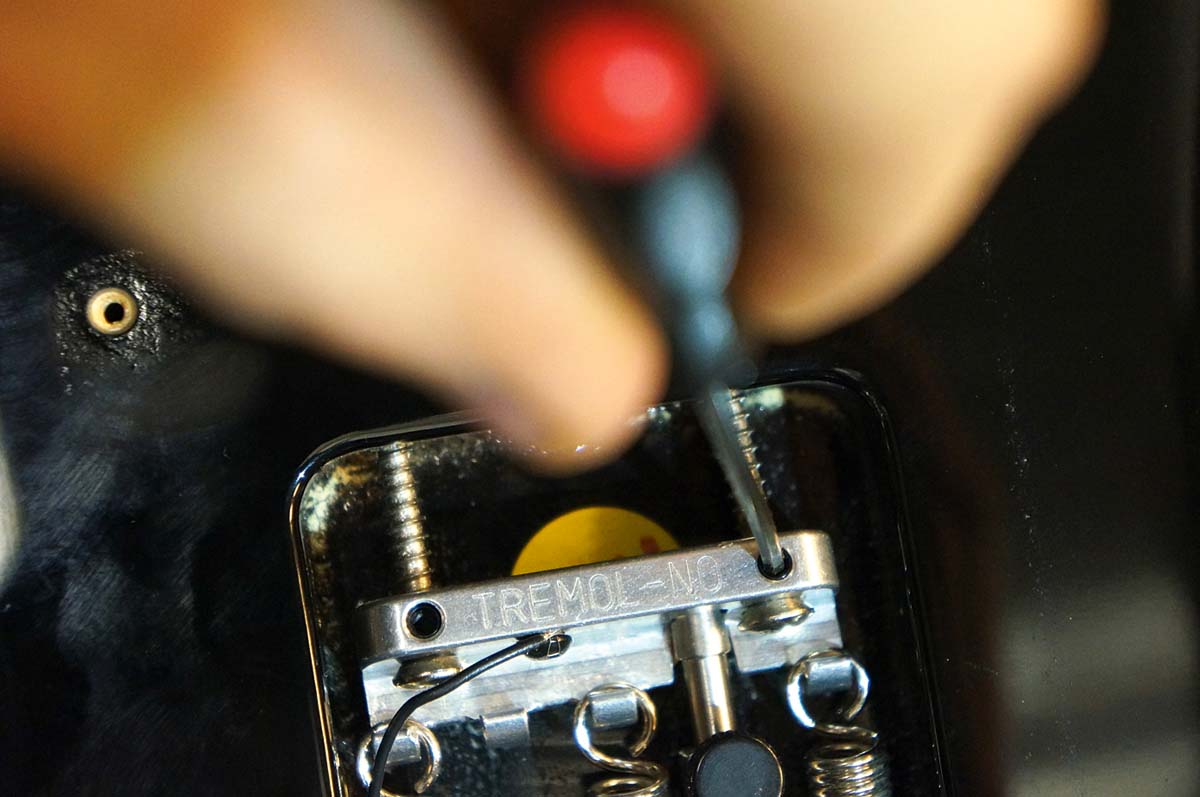
What use is this gizmo if everything isn’t locked in place? Let’s do up the final locking bolts. There are two grub screws that anchor onto the tremolo claw woodscrews, thus locking the tremolo claw in place.
Tighten this up but be wary that it may move the claw slightly. Tweak the screw tension until it balances correctly again.
Step 12.

You’re done, nice one. The two thumb bolts allow you to lock the whole tremolo down into fixed-bridge mode, whilst the other thumbscrew allows you to use the tremolo-dropping pitch only – handy for heavy palm-muting techniques. You need to let the tremolo balance freely, then butt up against the slider to set it.
Get The Pick Newsletter
All the latest guitar news, interviews, lessons, reviews, deals and more, direct to your inbox!
Jack runs an independent guitar setup and guitar repair service in Manchester, England. He serves the musicians of the Northwest of England, working on electric guitars, bass guitars, acoustic guitars and more. Jack has been writing the Fix Your Guitar column in Total Guitar Magazine since 2017.


![Joe Bonamassa [left] wears a deep blue suit and polka-dotted shirt and plays his green refin Strat; the late Irish blues legend Rory Gallagher [right] screams and inflicts some punishment on his heavily worn number one Stratocaster.](https://cdn.mos.cms.futurecdn.net/cw28h7UBcTVfTLs7p7eiLe.jpg)

