How to Prevent Note Fumbling and Improve Fretboard Control
Learn how to improve your fretboard control and reduce instances of missed, buzzing or fumbled notes during solos.

A lot of times when I solo, it feels like I should be putting quotes around the word “solo.”
Maybe you can relate to this phenomenon:
You build up some speed and start to breeze through a run that sounds good and seems reasonably technically, then you just start losing notes. By the time your run is finished, you surmise that maybe 70 percent of the notes you meant to play actually got played.
The rest?
You fumbled them away, either through half-muted buzzing notes or missing them entirely.
Remember Stevan Ridley, the New England Patriots running back? He had what we would call a “fumbling problem.” In fact, he fumbled so much that he got benched for it. The guy carried the ball a lot and even just a few fumbles was enough to land him in the coach’s dog house. What if guitar players were held to the same standard?
Here’s what I mean: Check out "Classical Gas” by Tommy Emmanuel.
Emmanuel isn’t dropping the ball on any notes. They’re all coming out clear. Now I’m not saying that this is the bar we must meet. Emmanuel is one of the best in the world, so we aren’t trying to match his raw skill.
However, we can apply the same principles, even to easy guitar songs.
We can learn something from players like Emmanuel, about how we practice and how our approach might need to change. Emmanuel has control over every note he plays, which means we should be intentional about practicing control and eliminating the problem of note fumbling.
Our typical response to fumbled notes
When we fumble notes, our most typical response is to just keep going. In a performance environment, that’s the right call. However, in a practice environment, that’s the absolute worst thing you can do. You continue on, yet you leave the mistake, or repeated mistakes, completely unaddressed. Thus, the only chance you get to practice it is the run that you’ve already screwed it up on.
That’s not going to help much. So here’s the simple solution:
When you’re working on a solo or practicing lead and you hear a fumbled note, STOP.
Deal with the issue immediately.
In the rest of this article I’m going to show you exactly how I’ve dealt with problem areas in my lead playing (with a concrete example) which has led me to have a lot more fretboard control and far less instances of missed, buzzing or fumbled notes during solos.
Step 1: Identify the problem areas
Our problem areas on the guitar are not uniform. Therefore, it’s going to be important that you take the time to find the areas where you’re making mistakes.
To illustrate, I’ll use a specific example from my own playing. One of my most notable areas of concern, I noticed during the following type of run:
The area I’ve highlighted in red is where I would always screw up. Namely, that note at the 10th fret (F) would often be a buzz or even a complete miss.
At this point, I stopped and focused on just that spot.
Step 2: Isolate the pattern
So what exactly was happening in that spot?
When I slowed down and played through it, I realized that I was implementing a hammer on and pull off with my pinky finger, going from the ninth to the tenth fret, then back to the ninth again.
If I were to isolate the tab, it would read like this:
For the notes on the seventh, ninth and 10th frets, I used my pointer, ring and pinky finger, respectively.
Where I ran into trouble was when I tried to grab the note at the 10th fret with my pinky via hammer on and then again when I tried to pull off back to the ninth fret.
That process was just a mess. So to clean it up, I did something extremely simple. I practiced it.
Here’s how:
Step 3: Practice the pattern
This tab essentially gave me a template for what would be a targeted and helpful exercise.
First, and most obviously, I just practiced that pattern over and over on different strings and at different spots of the fretboard.
You can make your own list, based on your particular problem areas, just like I did.
All I did was take each tab and repeat them a lot until the notes were coming out clean and I wasn’t hearing any buzz or nastiness. In other words, I practiced until I felt in control of the run.
These are just a few examples:
You can break the pattern down further to practice more specific movements.
For example, any strengthening of the ring and pinky finger will help.
So you can isolate the movement to address the specific fingers that are causing you problems, in a similar tab.
In my example, I do a similar tab without the hammer ons and pulls offs:
Then with:
For all three notes, I use the ring, pinky and ring finger again, respectively.
It doesn’t take a lot of this sort of targeted practicing to start to see improvement and cleaner solos.
The task is to take one problem area at a time, so as the weeks and months go by, your lead work gets cleaner and cleaner until you’re no longer fumbling any notes at all.
Simply repeat the process as you identify more areas of your soloing that need work. For me, it was hammer-ons and pull-offs with certain fingers. For you, it might be something totally different. Practice specifically, and it will get better.
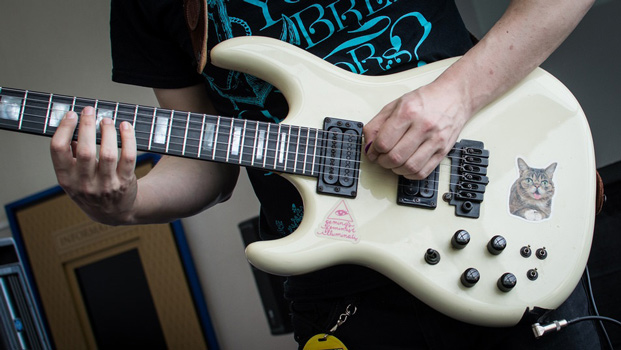
Flickr Commons Image via Kyle Gaddo
Bobby is Guitar Chalk's founder and editor. You can hit him up on Twitter or via email or shoot him questions via the Guitar Chalk Facebook page.
Get The Pick Newsletter
All the latest guitar news, interviews, lessons, reviews, deals and more, direct to your inbox!
Bobby is the founder of Guitar Chalk, and responsible for developing most of its content. He has worked with leading guitar industry companies including Sweetwater, Ultimate Guitar, Seymour Duncan, PRS, and many others.
“There are so many sounds to be discovered when you get away from using a pick”: Jared James Nichols shows you how to add “snap, crackle and pop” to your playing with banjo rolls and string snaps
Don't let chord inversions bamboozle you. It's simply the case of shuffling the notes around


![Joe Bonamassa [left] wears a deep blue suit and polka-dotted shirt and plays his green refin Strat; the late Irish blues legend Rory Gallagher [right] screams and inflicts some punishment on his heavily worn number one Stratocaster.](https://cdn.mos.cms.futurecdn.net/cw28h7UBcTVfTLs7p7eiLe.jpg)


