Songcraft: Becoming Your Own Producer, Part 2
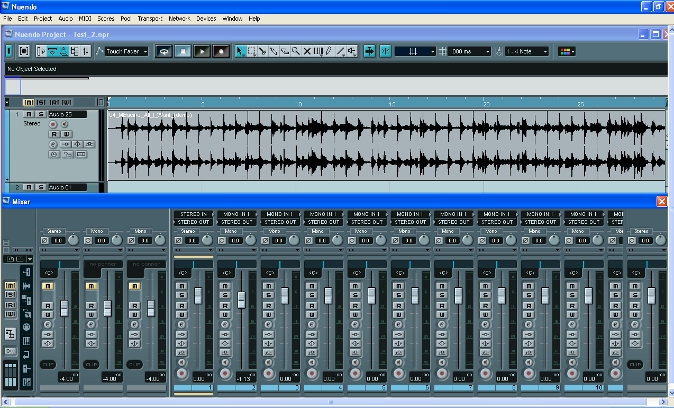
With a majority of today’s songwriters having powerful recording tools at their disposal, just a laptop’s click away, and the line between home and studio recordings blurring daily, writers/artists are finding themselves, more and more, in the role of de facto producer when looking to capture their latest creations.
With that in mind, Songcraft’s “Becoming Your Own Producer” series will look to dissect, simplify and offer insight into the (sometimes daunting) process and art of DIY music production.
(If you missed part one of the series, it can be found right here.)
Recording
So you’ve done all your pre-production prep work and you’re ready to begin recording your song? Cool. Let’s dive in.
• Disclaimer Obviously, the art of capturing sound is a topic so vast it can never be thoroughly covered within the limited confines of this space. There are, however, many instructional recording resources available on the web and in print. Seek them out and learn as much as you can. Since recording is so intertwined with what we do as songwriters/artists, it makes a lot of sense to educate one’s self on the subject even if you never intend to take on any DIY recording projects.
• Monitoring. It’s very important that you become sonically familiar with the speakers you’ll be listening through while recording. You don’t necessarily need expensive studio monitors (although owning a pair couldn’t hurt), just make sure to listen to a lot of music on whatever speakers you’ll be working with before recording so you’ll know what things are “supposed” to sound like in terms of lower, middle and upper frequencies when evaluating your own work.
Get The Pick Newsletter
All the latest guitar news, interviews, lessons, reviews, deals and more, direct to your inbox!
Truth be told, there are many factors that come into play with monitoring; the amplifier you pair your speakers with, the placement of your speakers in the room, the use or lack of acoustic treatment in the space, etc. Educate yourself on the aforementioned when you can but in the meantime, intimately knowing how other music sounds on your speakers in your space will, at least, give you a solid chance at crafting recordings that will translate decently in the real world.
• Take it from the top. As the saying goes, “garbage in, garbage out”. If you plan on recording a guitar that doesn’t sound so hot before you put a mic in front of it, don’t expect it to sound great when recorded. Make sure your instruments are up to snuff and sounding their best (fresh strings, tuned drums, etc.). These days there are a lot of affordable, quality instruments available. No reason not to use them. Same can be said of microphones. There are a slew of great mics on the market with very reasonable price-points.
• Mic placement. When preparing to record an instrument, mic it up (many good, instrument-specific web tutorials on this) and do a quick test record. Listen back. If the recording sounds close to what the instrument sounds like when played live in the room, great. If not, don’t adopt a “fix it in the mix” mentality, change the mic position and repeat the test process ‘till you achieve a recorded sound that’s fairly true to the instrument and pleasing to your ears.
• Drums, bass, rhythm. If you’re recording a song with live drums as the foundation (as opposed to drum samples or no drums at all) there are two ways to approach this task. You can record the kit yourself in your own space (there are many web tutorials on that subject) or you can book a commercial studio for a few hours to capture the drums, then bring those files back to your project studio and move forward with the rest of your production. I offer this second option, even within our DIY framework, because oftentimes folks find the concept of recording drums intimidating, beyond their skill-set or they may have other concerns such as noise level or equipment limitation issues, etc. If you can’t or would prefer not to record your own drums, find a reasonably priced, local studio and go there to lay down your kit. The studio will be glad to have your business and given its sonically-optimized setting, you’ll more than likely come home with some good sounding drum tracks.
When recording live drums, also record your bass and rhythm guitar (or keys) at the same time. This will hopefully make for a cohesive rhythm section. If capturing bass and your rhythm instrument while laying down drums is not possible for whatever reason (lack of physical space, technical limitations, etc), track drums only with just your rhythm guitarist or bassist playing along, unrecorded, for your drummer’s reference/benefit. Once you’ve got a good drum take, then overdub your bass and rhythm instrument(s).
• Scratch vocal. Now with a solid foundation in place (drums, either live or programmed, bass and a chordal instrument), have your singer record a quick, lead vocal. Since you’ll be re-recording this vocal part for keeps later in the process, don’t invest a lot of time perfecting the performance (although record it well, as you never know what kind of magic you might capture). This “scratch” vocal’s sole purpose will be to act as guide while recording the remainder of your music tracks, helping you, the producer, gauge if the support parts you’re laying down are either aiding or hindering the ever-important vocal line. If your tune is instrumental in nature, put down a scratch of your top-line melody for same purposes listed above.
Next time, “Becoming Your Own Producer” will add more cowbell as we continue discussing the recording phase of our production process.
Mark Bacino is a singer/songwriter based in New York City. When not crafting his own melodic brand of retro-pop, Mark can be found producing fellow artists or composing for television/advertising via his Queens English Recording Co. Mark also is the founder/curator of intro.verse.chorus, a website dedicated to exploring the art of songwriting. Visit Mark on Facebook or follow him on Twitter.
“Around Vulgar, he would get frustrated with me because I couldn’t keep up with what he was doing, guitar-wise – Dime was so far beyond me musically”: Pantera producer Terry Date on how he captured Dimebag Darrell’s lightning in a bottle in the studio
“He ran home and came back with a grocery sack full of old, rusty pedals he had lying around his mom’s house”: Terry Date recalls Dimebag Darrell’s unconventional approach to tone in the studio
