Need to Build a Functional DIY Pedalboard? Do Some Dumpster Diving
I build and repair guitars and basses professionally, and I've played guitar in a number of bands over the years. I am not an amp technician, so I cannot advise you on how to “blackface” your 1970s Twin Reverb.
But if your instrument is difficult to play or you want to hotrod your favorite guitar, this is where I can help. And from time to time, I will be sharing tips for getting the sound that you want to hear out of your gear or alerting you to new toys that I find irresistible. Be sure to comment below -- or on GW's Facebook page.
I was recently inspired by a YouTube video featuring Paul Gilbert.
Check it out here:
There’s no Bradshaw switching going on there. He uses a hunk of ¾-inch plywood painted black and sticks his stomp boxes down with Velcro. It's simple, effective and cheap! These kinds of cures are right up my alley, and with a gig looming in my future, I needed to get my stuff organized in order to comply with the strict set times the venue had established.
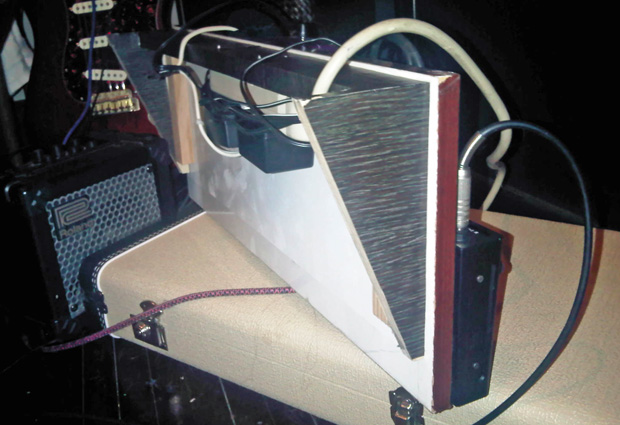
I gathered up a 12-by-24-inch piece of shelving stock that was lying inside my closet and pulled a scrap piece of plywood out of the neighborhood dumpster. Then I came across a nice stiff board of white oak that was nearly the perfect size to serve as a cross beam to add some rigidity to my planned assembly. After experimenting with the proper pitch angle of the floorboard, I sawed the plywood scrap into two matching triangles about the size of a slice of pizza.
I made some pencil marks on the underside of the pedal board as guides to keep the “legs” square and after double checking all the parts for size and shape, I used an air gun loaded with 16-gauge finishing nails to stick it all together.
All the latest guitar news, interviews, lessons, reviews, deals and more, direct to your inbox!
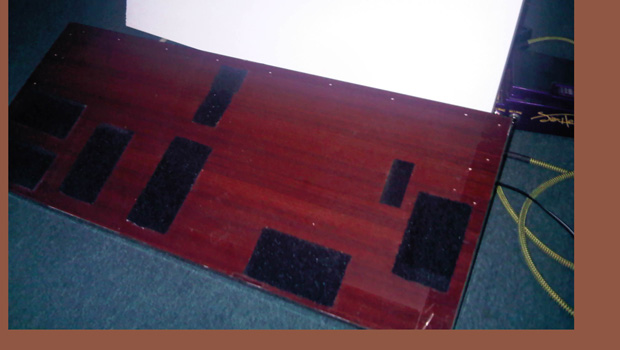
Next I determined the length of the oak board so that it would be a snug but not tight fit between the legs. It looked like the right size and shape, but since the materials I used were salvaged scrap, it was butt ugly. Luckily, I had the fix. I recently started installing a 3M product called Di-Noc vinyl. This material is sticky on one side and decorative on the other. Think high-tech wallpaper that you can cut to size. The adhesive side has a peel-off paper backing that makes the material easier to handle.
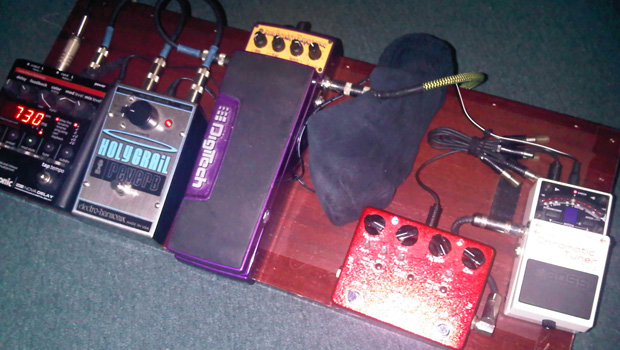
After covering all of the visible surfaces of my project, it was time to experiment with placement of the pedals. It is critical that your layout doesn’t cause you unnecessary hassles. If you use a bunch of stomp boxes, it’s a good idea to put the workhorses right in the front row. You don’t want to have to step over a pedal you use for the hook of just one song in order to stomp your go-to overdrive, unless it really works for you.
Once you have a logical layout happening and you’re sure you have the cables to make it work, you can slap some Velcro on the backside of all pedals and the corresponding locations on the pedal board. Then it’s just a matter of running the cabling.
As a finishing touch, I located some screw positions on the underside of the board and then attached a power strip. Other wall warts are plugged into a short extension cord, with the whole mess just crammed into a black sock to keep it all looking tidy.
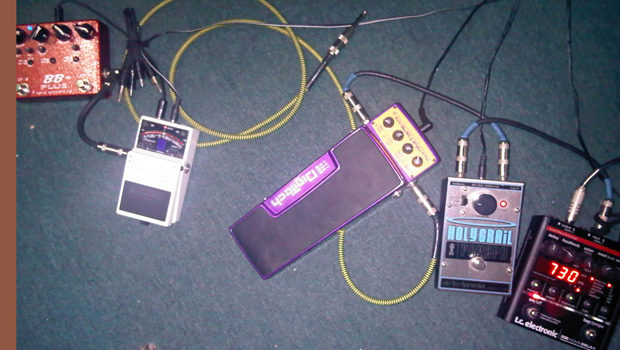
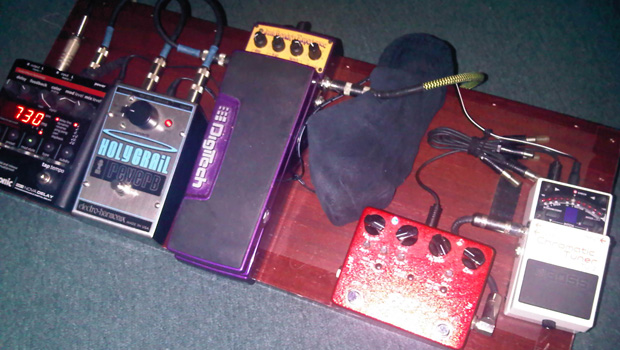
The Velcro is the only material I had to buy. Other than the DI-Noc covering, everything else I used was found in the dumpster. A 2” x 4’ roll of heavy-duty Velcro goes for about $12 at the hardware store, and the whole project took just over two hours. The finished product looks cool and it helped me shave about 10 minutes off of my setup time. Sweet. Now if I could just pick like Paul.
See you next time.
Marlin Hall is a self-taught guitarist with 27 years of experience and a strong DIY ethic, gigging on blues, cover tunes and original rock music on both coasts and in Minneapolis since 1991. Hall, a former sound engineer in Minneapolis, recently graduated from a guitar-building and repair program and provides repair and custom-guitar-building services in the Twin Cities area. For more info, visit timbuildsguitars.blogspot.com.
